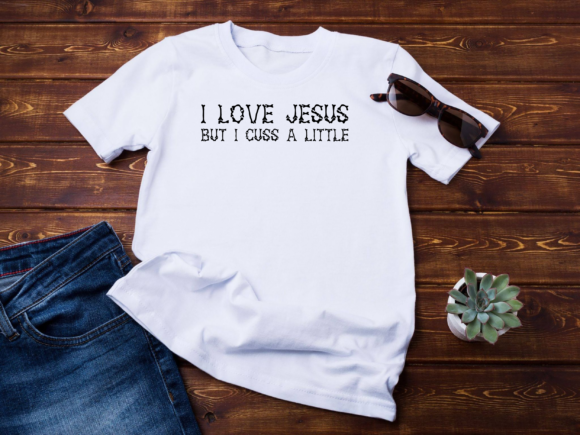
How to Craft and Sell "I Love Jesus but I Cuss a Little" Cricut Projects
There is a design that circulates through craft fairs, Etsy shops, and small-batch print-on-demand stores that stops people mid-aisle. "I Love Jesus but I Cuss a Little" hits a cultural nerve that cuts across demographics. It is irreverent, honest, and unexpectedly warm. For Cricut users, it is also a reliable project that tests your technical skills, your material choices, and your understanding of your audience.
This article is not about whether you should find the phrase funny or offensive. It is about how to take a design like this from an idea to a finished product—whether you are making one for yourself or scaling it into a product line. You will learn what this project demands from your machine, your materials, and your workflow, and how to deliver consistent results every time.
What This Design Demands from Your Cricut Workflow
The phrase itself is longer than most single-line vinyl decals. That alone changes how you approach every stage of production. A short word like "Blessed" or "Joy" cuts quickly, weeds easily, and applies without much drama. A nine-word phrase with punctuation, mixed letter lengths, and a comma requires planning.
Before you open Cricut Design Space, you need to decide how you intend to use the final product. A mug, a laptop sticker, a car window decal, a t-shirt, and a wooden sign all impose different constraints on file preparation, material selection, and cutting strategy. If you skip that decision, you will waste vinyl, transfer tape, and time.
File Preparation and Typography Decisions
The font you choose determines whether this project takes fifteen minutes or forty-five. Script fonts with thin connecting strokes can lose detail when cut at small sizes. Thick sans-serif fonts cut cleanly but lose the personality that makes the phrase work. A balanced approach is a hand-lettered-style font with moderate stroke weight—something that looks natural but does not disintegrate during weeding.
In Design Space, weld the entire phrase into a single layer. Do not leave individual letters floating. Welding eliminates overlapping cut lines and prevents the machine from lifting tiny pieces of vinyl that should stay attached. For a phrase this long, welding is not optional. It is the difference between a decal that pulls apart during application and one that behaves like a single piece of type.
Set your line spacing tight. The phrase reads as a single statement, not a list. If you leave default spacing, the design becomes too tall for standard placement on a mug or a laptop lid. Adjust kerning manually if the font allows it. Tight spacing also reduces the total cut area, which means less waste and faster cutting.
Material Selection and Preparation
Not all vinyl behaves the same way with long, detailed text. Permanent vinyl works well for outdoor or high-contact surfaces like water bottles and car windows. Removable vinyl suits indoor wall decals or laptop covers where you might want to change the design later. Heat transfer vinyl is its own category and requires mirroring your design.
For "I Love Jesus but I Cuss a Little," the most common material choices are:
- Permanent adhesive vinyl for laptops, water bottles, and car windows
- Removable adhesive vinyl for wall decals and dorm room doors
- Heat transfer vinyl (HTV) for t-shirts, hoodies, and tote bags
- Adhesive foil for a premium metallic look on cups and journals
Each material changes how you set your cut pressure and blade depth. Permanent vinyl typically cuts well at the default pressure for your machine, but HTV often requires more pressure, especially if you are using glitter or flocked varieties. Run a test cut on a scrap piece before committing to the full sheet. A test cut costs you two minutes and a scrap of material. A ruined sheet costs you time and product.
Weeding Strategy for Long Text
Weeding is where most Cricut users lose patience with this design. The phrase contains multiple loops, small interior spaces, and a comma that wants to lift off the backing paper. A good light source and a weeding tool with a fine point are non-negotiable.
Work from the center outward. Weed the small enclosed areas first—the loops in "Jesus," the counter spaces in "Cuss," and the interior of any uppercase letters. Once those delicate bits are free, you can pull away the larger negative space without risking damage to the fine details. If you pull from the edges first, you stress the narrow connections between letters and risk snapping them.
When you encounter a problematic letter that keeps lifting, stop and check your cut depth. A blade that is too shallow will leave uncut film that tears when you weed. A blade that is too deep will score the backing paper and make it harder to separate the vinyl from its carrier.
Transfer Tape Application: Where Most Projects Fail
The transfer step is the single most common failure point for a phrase-length decal. Standard transfer tape works for most smooth vinyl, but the length of this design means you have more surface area to manage. If your transfer tape loses adhesion before you reach the final position, the entire decal wrinkles or folds onto itself.
Use a medium-tack transfer tape for smooth surfaces. If you are applying to textured walls or rough surfaces, use strong-tack tape. Apply the tape to the decal slowly, starting at one end and using a scraper tool to push air bubbles out as you go. Do not lift the tape once it touches the vinyl. Lifting introduces dust and lint that reduce adhesion.
When you transfer the decal to the final surface, hinge it. Tape the top edge of the decal to the surface with painter's tape, then lift the bottom half to remove the backing paper. Lower the decal slowly, using the scraper to press it down from the center outward. Hinging gives you control over alignment and prevents the decal from twisting mid-application.
Scaling from One Project to a Product Line
If you are making this design for yourself, the process above gives you a clean, durable result. If you are making it to sell, you need to systematize every step.
Batch your work. Cut multiple sheets of the same design in one session. Weed them all at once while the weeding technique is fresh in your mind. Apply transfer tape to all of them before you start packaging. Batching reduces setup time and builds muscle memory that speeds up each repetition.
Standardize your material sources. Cheap vinyl from unknown suppliers cuts unpredictably, weeds poorly, and fails in the field. If you sell a decal that peels off after a month, your customer does not blame the vinyl. They blame you. Use consistent materials from reputable brands, and test every new batch before you list it for sale.
Price for the time, not the material cost. A decal that takes you twenty minutes to design, cut, weed, tape, and package is worth more than the cost of the vinyl. Factor in your labor, your overhead, and the risk of waste. A well-made decal at a fair price earns repeat customers. A cheap decal earns complaints.
Listing and Marketing Considerations
The audience for "I Love Jesus but I Cuss a Little" is specific but not narrow. It appeals to people who want faith and authenticity in the same sentence. When you write your product listing, let the design speak for itself. Avoid defensive language. Do not explain why it is acceptable. Describe the product quality, the size options, the application instructions, and the care guidelines.
Include clear photos that show the decal applied to real objects on real surfaces. Flat lay photos of the decal on a cutting mat do not help a customer visualize it on their laptop. Show it on a yeti cup, a car window, a notebook cover. Context sells.
Long-Term Quality and Durability
A decal this personal often becomes a permanent fixture on a customer's everyday item. That means it needs to survive hand washing, sun exposure, and the occasional scrape against a table edge.
For outdoor use, choose vinyl rated for at least three years of UV exposure. For dishwasher-safe items, apply a sealing coat or direct the customer to hand wash. Adhesion weakens over time if the decal is submerged in hot water repeatedly. Set expectations clearly in your packaging or listing so the customer knows how to care for the decal.
For apparel applications with HTV, wash instructions matter. Turn the garment inside out, wash in cold water, and tumble dry on low. High heat breaks down the adhesive bond between the vinyl and the fabric. A shirt that looks perfect after one wash and cracked after three reflects poorly on your craft, even if the customer ignored the instructions.
Working with Design Variations
The phrase itself has variations. Some people prefer "follow" instead of "love." Others add a cross or a halo symbol. Still others want the text in a circle or a shield shape. Each variation requires you to revisit your file preparation and test cuts.
Circular layouts change how the text reads and how it fits on a surface. A circle fits well on a Yeti-style cup but poorly on a rectangular laptop lid. Shield shapes add visual weight but increase the total cut area and weeding difficulty. Offer variations as separate listings rather than forcing a single design to fit every surface. Customization is fine, but standardize the most popular formats to keep your workflow efficient.
Final Thoughts on Execution
Building a Cricut project around a phrase like "I Love Jesus but I Cuss a Little" is straightforward if you respect the mechanics of the craft. The design is not complicated. The font choice is a matter of taste. The material selection depends on the surface. What separates a clean, professional result from a frustrating mess is preparation and patience.
Weld your text. Test your cut. Weed carefully. Use the right transfer tape. Apply with a hinge. Batch for efficiency. Price for value. And when the decal is on the customer's laptop or car window, it will stay there and do its job—getting a laugh, a nod, or a conversation started. That is the point of making things that people want to display. The craft is just the method. The connection is the purpose.